Integration options
Use a stable identifier for user requests
Requests to your AIProxy service contain a header, aiproxy-client-id, which is used for rate limit tracking and for display in the 'Request History' tab of the AIProxy developer dashboard. By default, the AIProxySwift SDK sets this client ID to Apple's IDFV. The end-user has the ability to refresh this identifier (for example, by deleting all apps from a specific developer and then reinstalling). As such, it's not the best option for rate-limiting. We offer a more stable identifier that can be turned on using the AIProxy.configure method:
import AIProxy

// In your UIKit AppDelegate or SwiftUI @main struct:
AIProxy.configure(
    logLevel: .info,
    printRequestBodies: false,
    printResponseBodies: false,
    resolveDNSOverTLS: true,
    useStableID: true, // <-- Enable this
)
If you set useStableID to true, you must also add the iCloud capability to your target and flip on the key-value store checkbox:
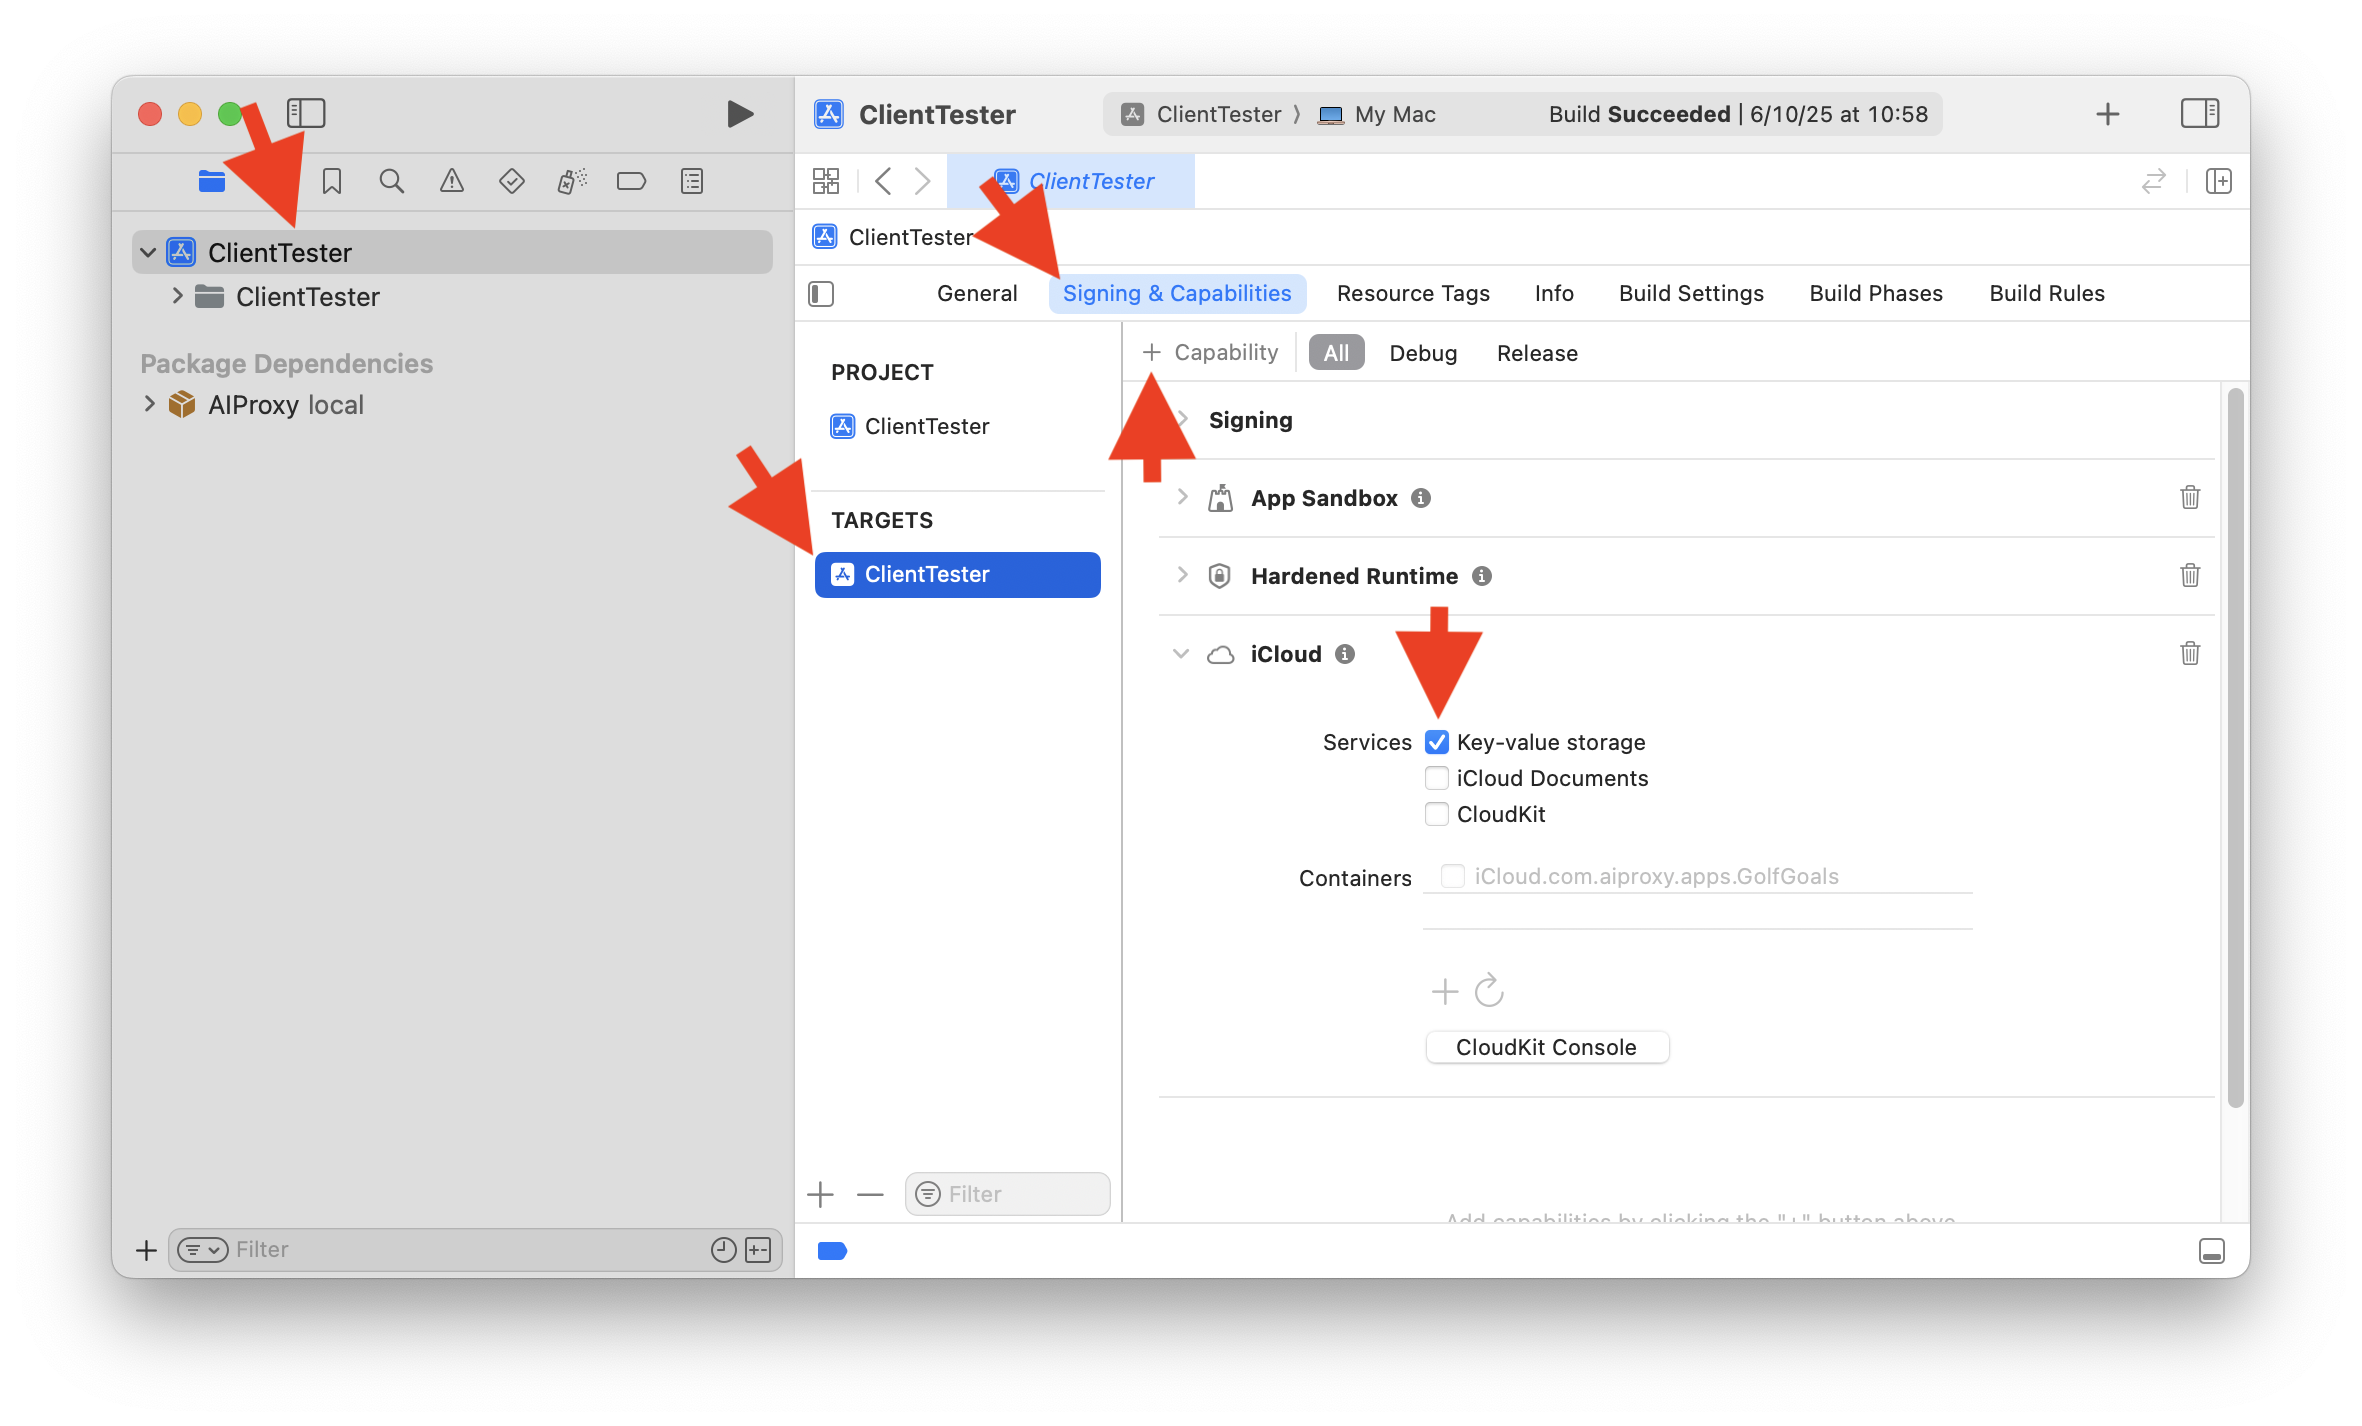
With this enabled, requests will first try to use StoreKit's appTransactionID and will fall back to a GUID that is synced across iCloud-backed keychain and UKVS. The anonymous identifier will be the same for a single app store user across devices and across installs.
Troubleshooting:If you do not enable iCloud's key-value store, you will see this error in your Xcode console at runtime: BUG IN CLIENT OF KVS: Trying to initialize NSUbiquitousKeyValueStore without a store identifier. Please specify your store identifier in the 'com.apple.developer.ubiquity-kvstore-identifier' entitlement.
Specify your own clientID to annotate requests
If your app already has client or user IDs that you want to annotate AIProxy requests with, pass a second argument to the provider's service initializer. For example:
let openAIService = AIProxy.openAIService(
    partialKey: "partial-key-from-your-developer-dashboard",
    serviceURL: "service-url-from-your-developer-dashboard",
    clientID: "<your-id>"
)
Requests that are made using openAIService will be annotated on the AIProxy backend, so that when you view top users, or the timeline of requests, your client IDs will be familiar.
If you do not have existing client or user IDs, no problem! Leave the clientID argument out, and we'll generate IDs for you. See AIProxyIdentifier.swift if you would like to see ID generation specifics.
Make requests directly to all providers we support
For every factory method on AIProxy.swift, e.g. AIProxy.openAIService, there is now a companion factory called AIProxy.openAIDirectService that accepts an unprotected API key. All calls that you make against this service go straight to the service provider. Sample usage:
import AIProxy

/* Uncomment for BYOK use cases */
let openAIService = AIProxy.openAIDirectService(
    unprotectedAPIKey: "your-openai-key"
)

/* Uncomment for all other production use cases */
// let openAIService = AIProxy.openAIService(
//     partialKey: "partial-key-from-your-developer-dashboard",
//     serviceURL: "service-url-from-your-developer-dashboard"
// )

do {
    let response = try await openAIService.chatCompletionRequest(body: .init(
        model: "gpt-4o-mini",
        messages: [.system(content: .text("hello world"))]
    ))
    print(response.choices.first?.message.content ?? "")
}  catch AIProxyError.unsuccessfulRequest(let statusCode, let responseBody) {
    print("Received \(statusCode) status code with response body: \(responseBody)")
} catch {
    print("Could not create OpenAI chat completion: \(error.localizedDescription)")
}
Specify your own clientID to annotate requests
If your app already has client or user IDs that you want to annotate AIProxy requests with, pass a second argument to the provider's service initializer. For example:
let openAIService = AIProxy.openAIService(
    partialKey: "partial-key-from-your-developer-dashboard",
    serviceURL: "service-url-from-your-developer-dashboard",
    clientID: "<your-id>"
)
Requests that are made using openAIService will be annotated on the AIProxy backend, so that when you view top users, or the timeline of requests, your client IDs will be familiar.
If you do not have existing client or user IDs, no problem! Leave the clientID argument out, and we'll generate IDs for you. See AIProxyIdentifier.swift if you would like to see ID generation specifics.
How to catch Foundation errors for specific conditions
We use Foundation's URL types such as URLRequest and URLSession for all connections to AIProxy. You can view the various errors that Foundation may raise by viewing NSURLError.h (which is easiest to find by punching cmd-shift-o in Xcode and searching for it).
Some errors may be more interesting to you, and worth their own error handler to pop UI for your user. For example, to catch NSURLErrorTimedOut, NSURLErrorNetworkConnectionLost and NSURLErrorNotConnectedToInternet, you could use the following try/catch structure:
import AIProxy

let openAIService = AIProxy.openAIService(
    partialKey: "partial-key-from-your-developer-dashboard",
    serviceURL: "service-url-from-your-developer-dashboard"
)

do {
    let response = try await openAIService.chatCompletionRequest(body: .init(
        model: "gpt-4o-mini",
        messages: [.assistant(content: .text("hello world"))]
    ))
    print(response.choices.first?.message.content ?? "")
}  catch AIProxyError.unsuccessfulRequest(let statusCode, let responseBody) {
    print("Received non-200 status code: \(statusCode) with response body: \(responseBody)")
} catch let err as URLError where err.code == URLError.timedOut {
    print("Request for OpenAI buffered chat completion timed out")
} catch let err as URLError where [.notConnectedToInternet, .networkConnectionLost].contains(err.code) {
    print("Could not make buffered chat request. Please check your internet connection")
} catch {
    print("Could not get buffered chat completion: \(error.localizedDescription)")
}